> For the complete documentation index, see [llms.txt](https://docs.lsports.eu/u/llms.txt). Markdown versions of documentation pages are available by appending `.md` to page URLs; this page is available as [Markdown](https://docs.lsports.eu/u/trade/user-guide/configuration/user-avatar.md).
# Profile & Account
Access profile settings, account details, and plan information from the avatar menu.
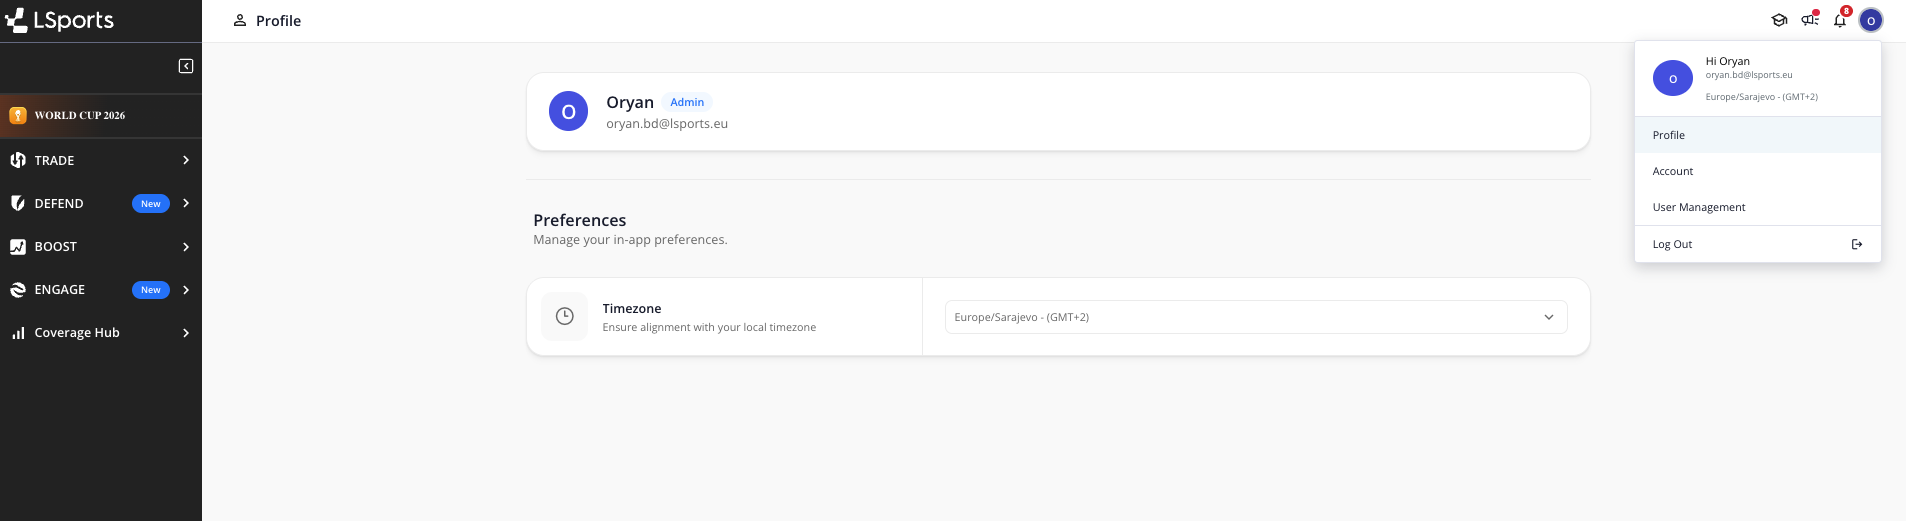
Click the **avatar icon** in the top-right corner of the platform to access your profile and account.
***
## Top Bar: Avatar Menu Options
Easily access tools by clicking the avatar icon in the top bar.
Below is an overview of the available options:
## Profile
Access time zone selection and your profile details from the Avatar menu:
1. Click the avatar icon in the top bar
2. Select **Profile**
At the top of the page, your **Name**, **Email**, and **Role** are displayed as read-only fields.
**Time Zone dropdown**
A Time Zone dropdown shows the current setting. You can search by typing in the dropdown to filter the list. The time zone configured as the **Organization Default** is marked with a visual tag in the list (e.g. "Organization Default") so you can easily identify it.
**Saving your time zone**
Click **Save** to apply your selected time zone. The change is applied immediately across the platform UI.
**Things to know:**
* Time zone preferences are stored per user — each person on your team can set their own
* Changes apply to the platform UI only; CSV and JSON exports remain in system default time
* Your setting persists across sessions — no need to reset it each time you log in
***
## Account
View your active plan and manage your organization's business details. Access the **Account** page from the avatar menu.
The Account page is organized into two tabs:
* **Plan & Usage** — Browse the full product catalog, view your active packages, and track quota consumption.
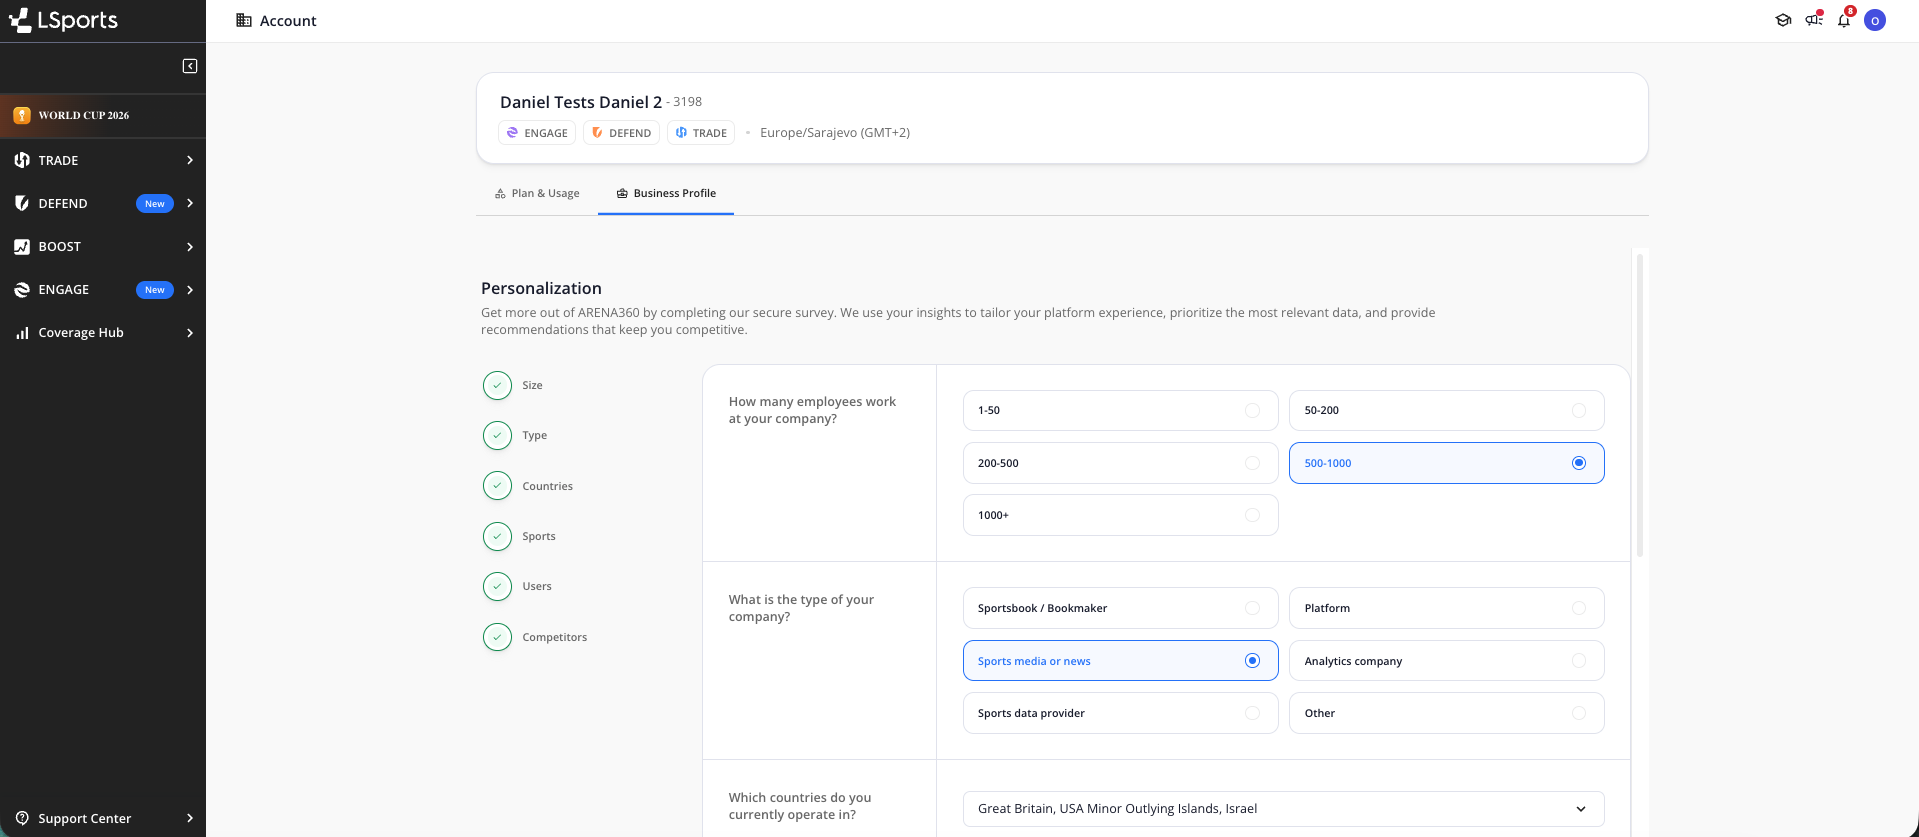
* **Business Profile** — View and update your organization's business details.
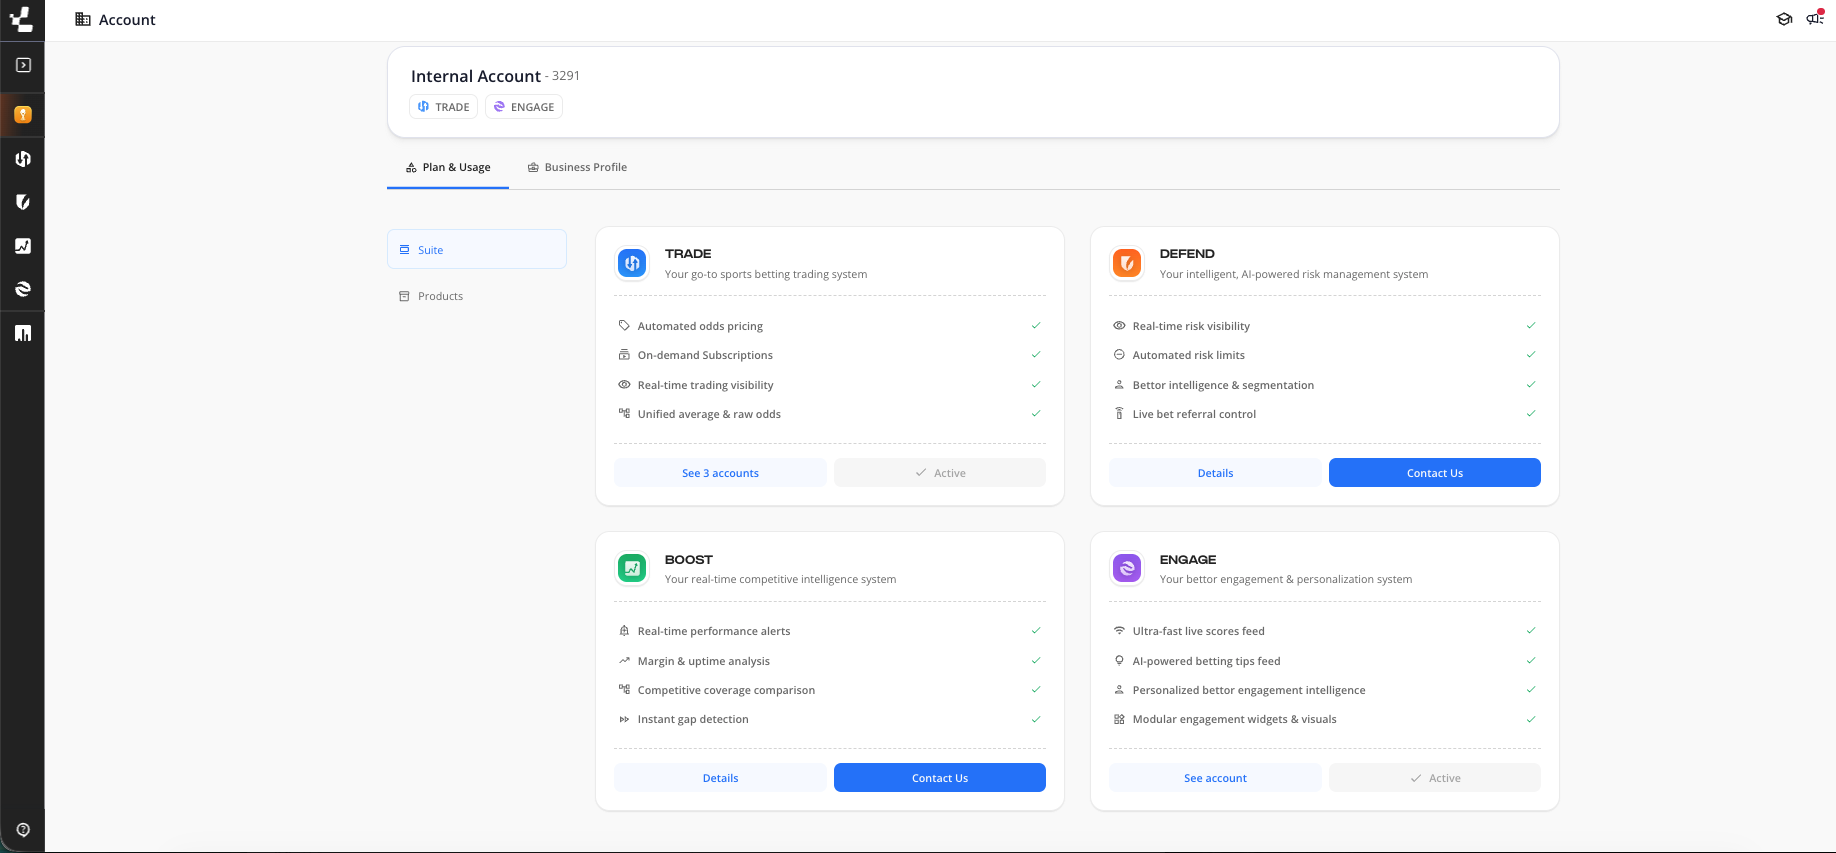
The Suite view in the Plan & Usage tab
### Plan & Usage
The **Plan & Usage** tab has two views, selected from the left sidebar: **Suite** and **Products**.
#### Suite
The **Suite** view is your product catalog. It shows all four LSports products — TRADE, DEFEND, BOOST, and ENGAGE — whether or not your organization owns them. Each product appears as a card with a short description and its key capabilities.
Each card reflects your current access:
* **Products you own** show an **✓ Active** badge and a **See X accounts** link, where X is the number of accounts using that product. Click the link to view those accounts.
* **Products you don't own** show a **Details** link and a **Contact Us** button.
Click **Details** to open that product's documentation in a new browser tab. Click **Contact Us** to send a request to the relevant CSM; the button confirms once your request is sent, and resets if you leave and return to the page.
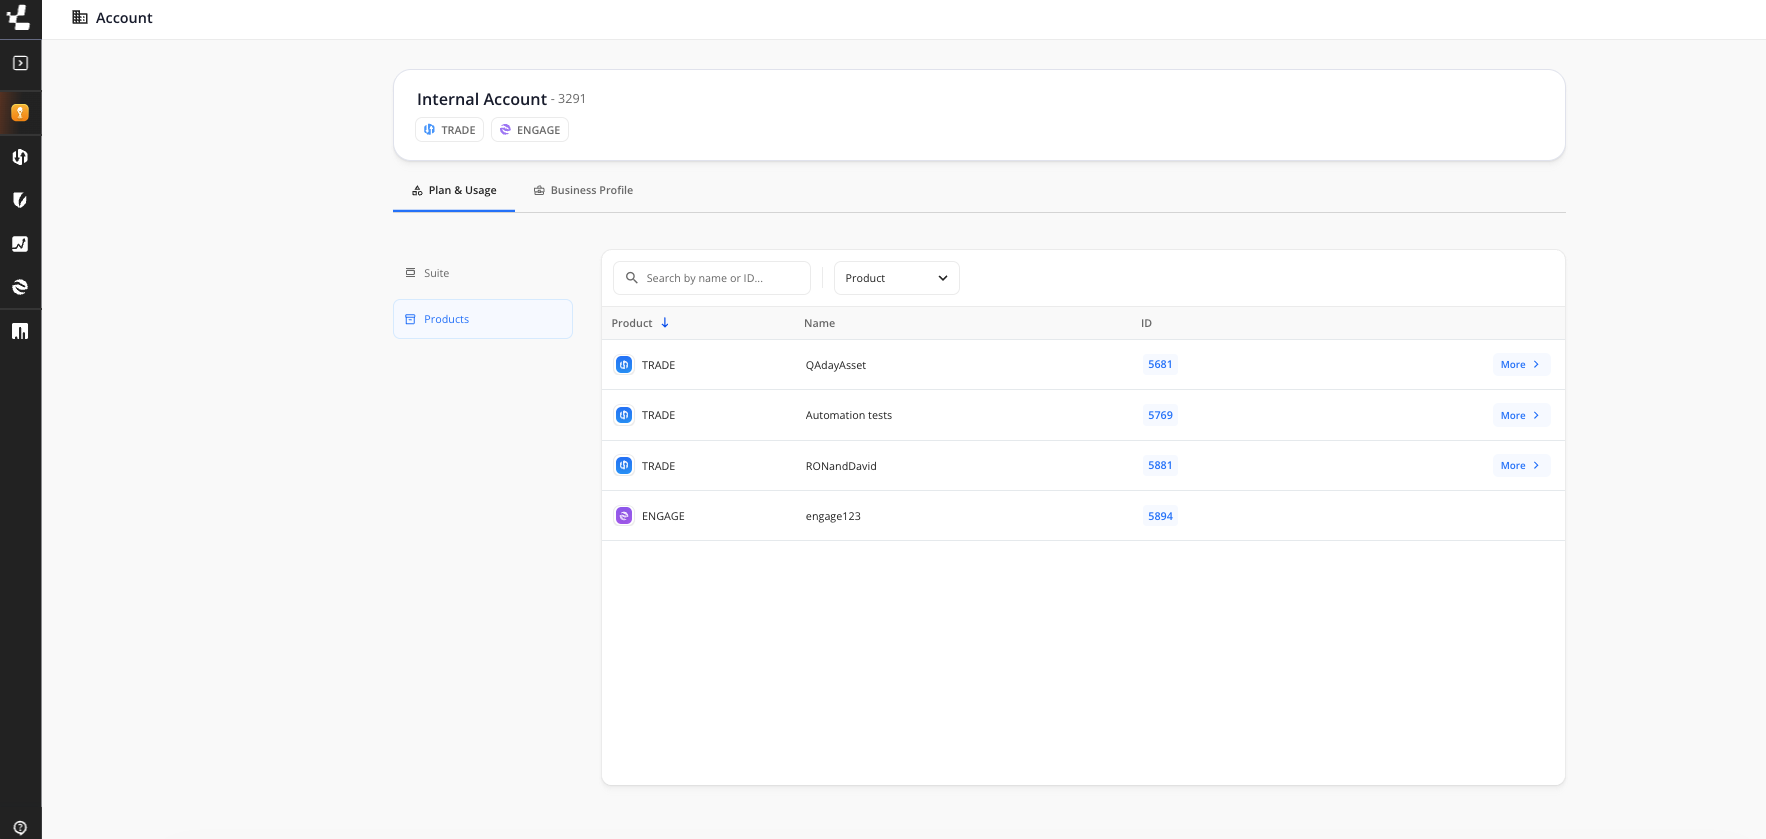
#### Products
The **Products** view lists all products and packages associated with your account. The products table shows each package's product, name, and ID. Use the search bar to filter by name or ID. Use the **Product** dropdown to filter the list by product.
The Products view in the Plan & Usage tab
**TRADE Package Details**
TRADE rows include a **More** button. Click **More** to open the package detail view for that account.
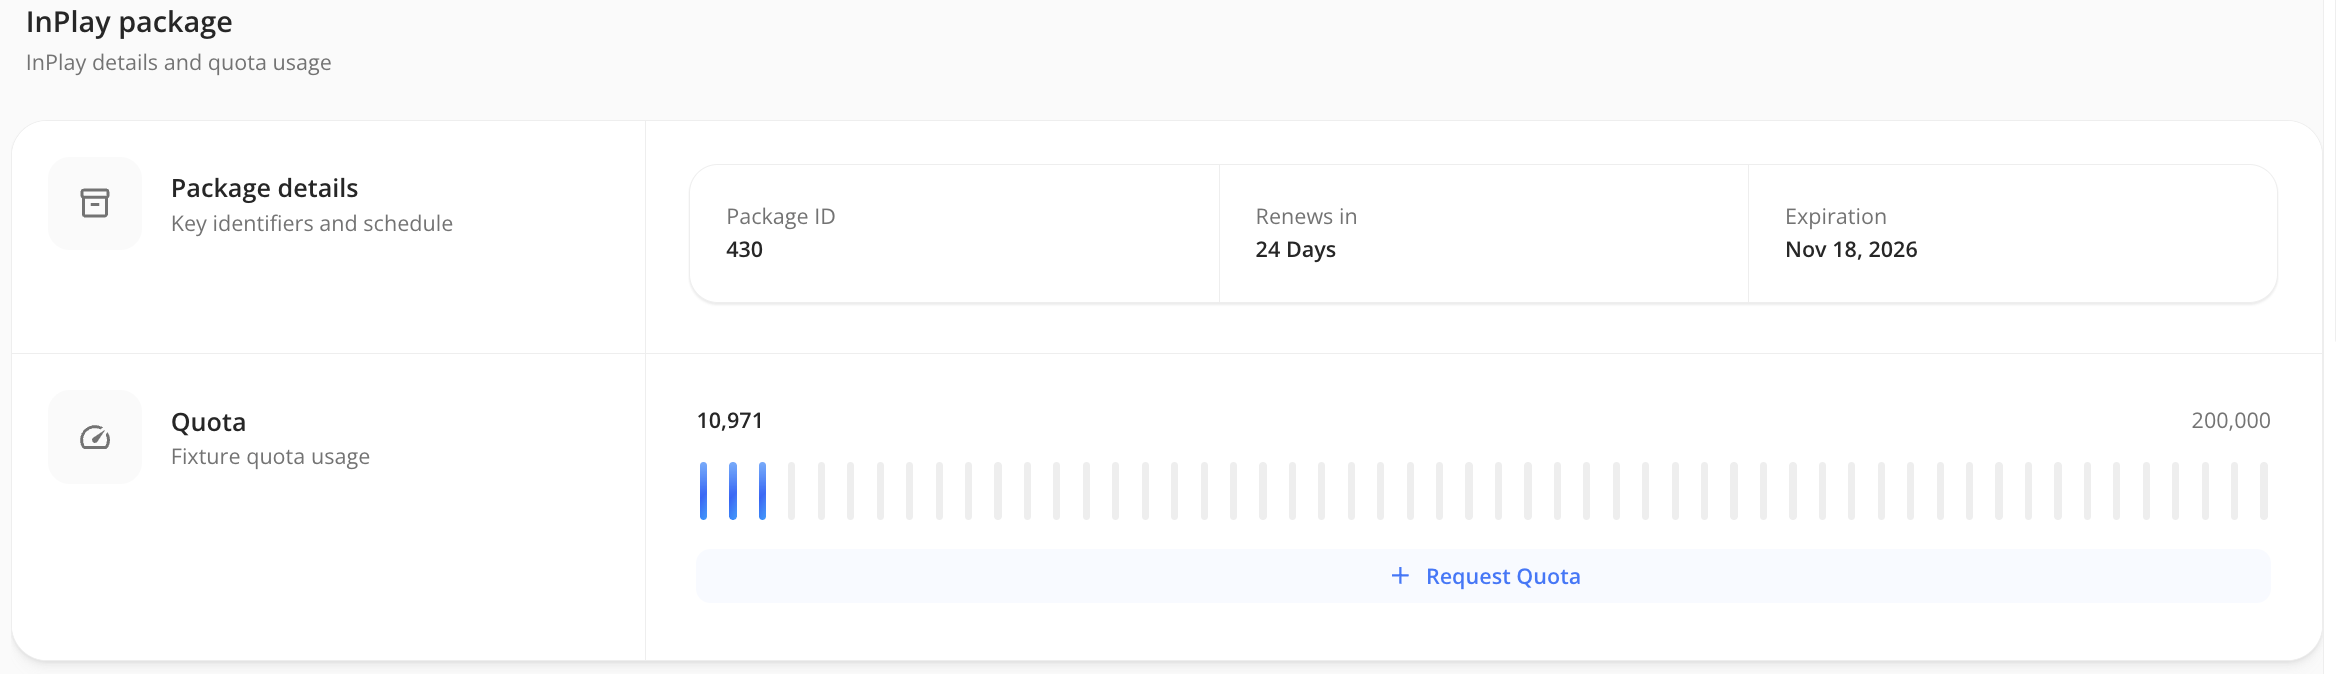
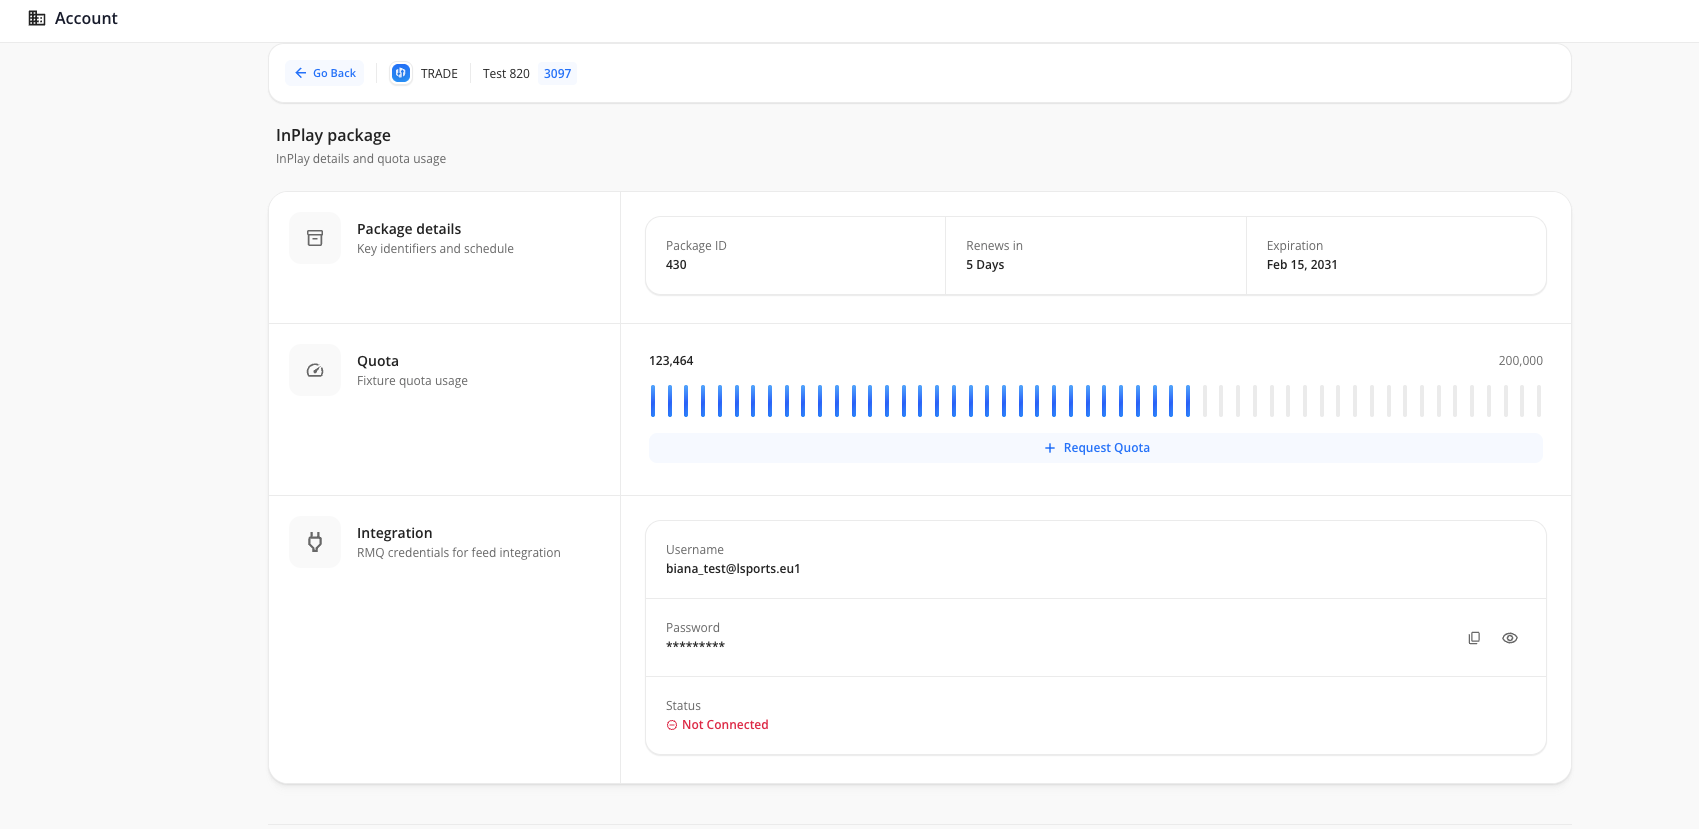
The detail view shows two sections: **InPlay package** and **PreMatch package**.
*InPlay package*
Displays the Package ID, renewal schedule, and expiration date for your InPlay subscription.
The quota bar shows your InPlay fixture consumption. The left figure is the number of fixtures used; the right figure is your total allowance.
This quota reflects fixtures **consumed**, not your remaining balance. To see remaining quota, go to [Fixture Ordering](/u/trade/user-guide/booking-events-and-odds-settings/fixture-ordering.md).
To request a quota increase, click **+ Request Quota**. This sends a message to your CSM to initiate the request.
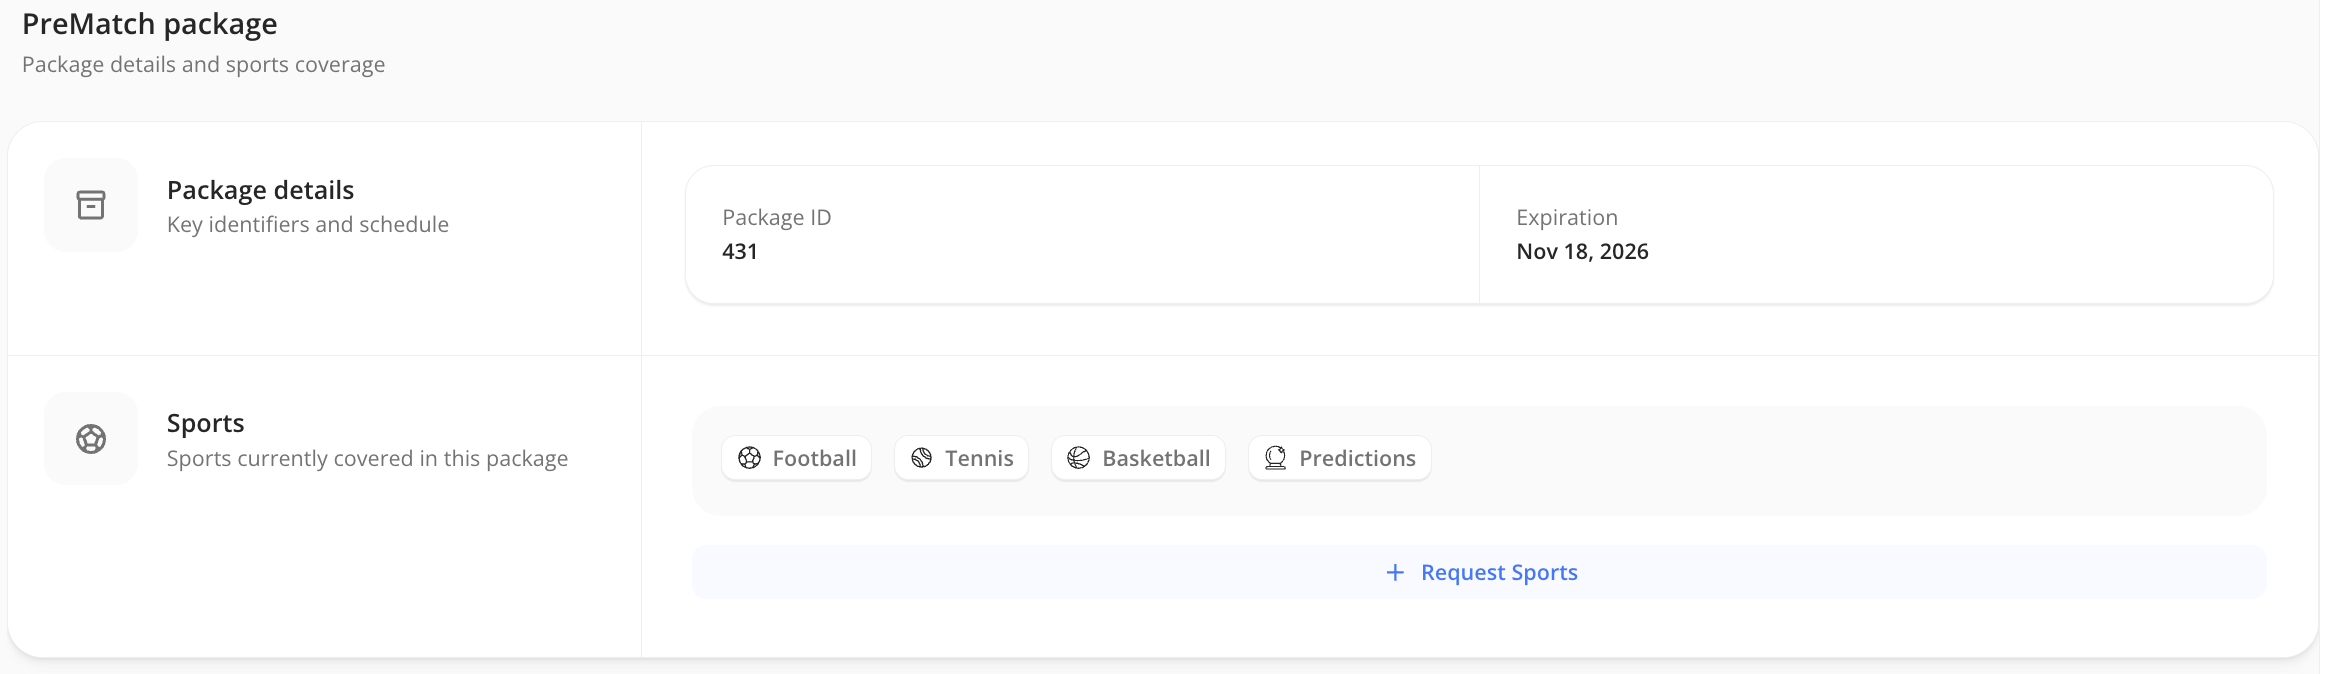
*PreMatch package*
Displays the Package ID and expiration date for your PreMatch subscription, along with the sports currently included in your package.
To request additional sports coverage, click **+ Request Sports**. This sends a message to your CSM to initiate the request.
### Integration
Each TRADE package includes an **Integration** section within the package detail view. This section is visible to admins only.
To access it: click the avatar icon → **Account** → **Plan & Usage** → click **More** on a TRADE package → scroll to **Integration**.
Integration credentials within the TRADE package detail view
The following fields are displayed per package:
| Field | Description |
| ------------ | ---------------------------------------------- |
| **Username** | Your RabbitMQ username for this package |
| **Password** | Your RabbitMQ password (masked by default) |
| **Status** | Connection status — Connected or Not Connected |
Click the eye icon next to the password to reveal it. Click the copy icon to copy the value to your clipboard — this works even when the field is masked.
***
### Business Profile
View and update your organization's business details. This information helps customize our offering to your business goals.
***
## User Management
Manage users, roles, and account-level settings. Admins can invite new users, assign roles, and update existing accounts from here.
* **Profile** — Basic profile information like email address, job title, and description.
* **Time Zone** — Account admins can set a time zone for the entire account, ensuring consistent date and time display across the platform. Exceptions apply to CSV and JSON files, which will remain in the default system time. This setting is saved across sessions and doesn't require resetting.
{% hint style="warning" %}
Once the default time zone setting is changed, it cannot be reverted to the original default. As a workaround to reset to a neutral time zone, we recommend choosing a location like Monrovia (GMT +0:00).
{% endhint %}
* **Users** — This is where all user accounts are listed. You can edit a user profile or create a new user account.
For full details on user roles, permissions, and how to invite users, see [User Management](/u/reference/user-management.md).
***
## Log Out
Click **Log Out** to securely sign out of the platform.
***
## Related
* [User Management](/u/reference/user-management.md) — Full guide to roles, permissions, and user administration
---
# Agent Instructions
This documentation is published with GitBook. GitBook is the documentation platform designed so that both humans and AI agents can read, navigate, and reason over technical content effectively. Learn more at gitbook.com.
## Querying This Documentation
If you need additional information that is not directly available in this page, you can query the documentation dynamically by asking a question.
Perform an HTTP GET request on the current page URL with the `ask` query parameter, and the optional `goal` query parameter:
```
GET https://docs.lsports.eu/u/trade/user-guide/configuration/user-avatar.md?ask=&goal=
```
`ask` is the immediate question: it should be specific, self-contained, and written in natural language.
`goal` is optional and describes the broader end goal you are ultimately trying to accomplish on behalf of the user. GitBook uses it to tailor the answer towards what is most useful for that goal.
The response will contain a direct answer to the question and relevant excerpts and sources from the documentation.
Use this mechanism when the answer is not explicitly present in the current page, you need clarification or additional context, or you want to retrieve related documentation sections.